15 Coastal Chic Laundry Room Ideas
This post may contain affiliate links. If you make a purchase through one of my links, I may receive a small commission at no cost to you.
I'm thrilled to share my 15 coastal chic laundry room ideas with you! Let's have fun transforming your laundry space into a peaceful beachy retreat with these budget-friendly and simple DIY projects.
I believe you can do this and create a space that not only makes laundry more enjoyable but also exudes those calming seaside vibes we all love.

1. Nautical Stripes
Bring classic seaside charm with bold nautical stripes. Use painter's tape to easily create those crisp lines on your walls. If painting isn't an option, consider striped curtains or rugs to achieve the look.
Picture This: Imagine walking into your laundry room and feeling like you're stepping onto a sun-drenched sailboat. The bold navy and white stripes on your walls create a classic coastal charm, perfectly complemented by striped rugs underfoot. This striking pattern sets a fresh, clean tone, reminiscent of a nautical adventure.

How to Recreate It:
Materials Needed:
Painter’s tape
Navy blue and white paint
Level for even lines
Optional: striped curtains or rugs
Budget Tip: Use painter's tape to create crisp wall stripe patterns. Opt for navy blue and white for a traditional look, or experiment with softer blues for a subtle effect. If painting isn't an option, you can also incorporate stripes through textiles like curtains or rugs.
DIY Project: Paint an accent wall with alternating white and navy stripes.
Start by painting the entire wall white.
Once dry, use a level and painter's tape to mark out evenly spaced horizontal lines.
Paint every other section navy blue for a striking striped effect.
Remove the tape while the paint is still slightly wet for the cleanest lines.
Tips for Beginners:
Start with a small wall or section to practice your striping technique.
Use a laser level to ensure your lines are straight before taping them off.
Apply light coats of paint to prevent bleeding under the tape and achieve clean lines.
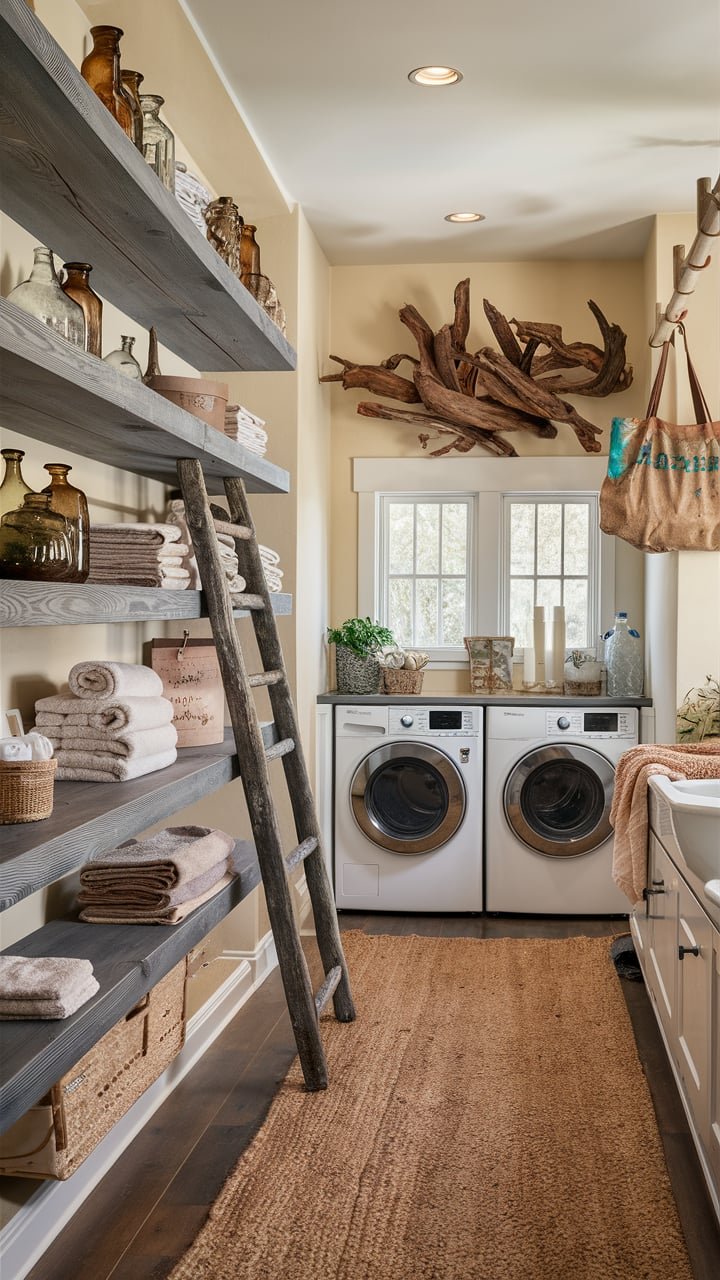
2. Weathered Wood Accents
Capture the rustic feel of driftwood with peel-and-stick wood-look wallpaper or create a rustic shelf with reclaimed wood. It's a quick way to add authentic coastal texture.
Picture This: The rustic feel of driftwood takes over your laundry room. Weathered wood accents, like a beautiful reclaimed wood shelf, lend an authentic seaside texture. Each piece tells a story, as if it was plucked straight from a windswept beach.

How to Recreate It:
Materials Needed:
Peel-and-stick wood-look wallpaper
Reclaimed wood or driftwood
Sandpaper for smoothing
Clear sealant to protect wood
Budget Tip: Use peel-and-stick wood-look wallpaper for an instant transformation. Apply it to a single wall, the sides of cabinets, or even on countertops for a budget-friendly wood effect. Look for varieties with a grey, weathered finish for that authentic coastal look.
DIY Project: Create a rustic shelf using reclaimed driftwood or pallet wood.
Sand the wood lightly to remove any rough spots, but leave some of the weathered patina for character.
Apply a clear sealant to protect the wood.
Mount the shelf using hidden brackets for a floating effect, perfect for displaying coastal decor or storing laundry essentials.
Tips for Beginners:
Choose peel-and-stick wood wallpaper for an easy application that requires no power tools.
If using real wood, lightly sand edges to avoid splinters.
Test clear sealant on a small wood section to ensure it doesn't alter the color.
3. Sea Glass Color Palette
Add sea glass hues with storage bins or small accessories. Try painting mason jars in frosted sea glass colors for beautiful, functional storage.
Picture This: Your laundry room glows with soothing hues of sea glass. Shades of soft blues and greens mimic the gentle waves of the ocean, creating a serene escape right in your own home. Imagine mason jars in frosted sea glass colors, lined up in a neat row, adding both style and function.

How to Recreate It:
Materials Needed:
Storage bins in blue/green shades
Mason jars for painting
White paint for mixing
Fine-grit sandpaper
Budget Tip: Incorporate sea glass colors through affordable accessories like storage bins, hangers, and small appliances. Look for items in various shades of blue and green to create a cohesive sea glass palette. Even small touches like colored glass soap dispensers can make a big impact.
DIY Project: Paint mason jars in various sea glass hues for stylish storage.
Clean and dry your jars thoroughly.
Mix a small amount of white paint with your chosen colors to create that frosted sea glass look.
Apply the paint to the outside of the jars in thin, even coats.
Once dry, use fine-grit sandpaper to distress the paint slightly for an authentic weathered appearance.
Use these jars to store laundry pods, clothespins, or as vases for beachy plants.
Tips for Beginners:
Practice mixing paint on paper to achieve the perfect sea glass shade before applying it to glass jars.
Use painter’s tape to create even paint edges.
Start with larger, more forgiving surfaces like a large blank canvas, then progress to your specialty or decorative jars and smaller items.
4. Rope Details
Add charm with nautical rope drawer pulls or a rope-wrapped mirror. These simple touches enhance the maritime feel beautifully.
Picture This: Picture walking into a space that exudes maritime elegance with thoughtfully placed rope details. From drawer pulls to mirror frames wrapped in rope, each element evokes the charm of a bustling, yet tranquil, dockside.

How to Recreate It:
Materials Needed:
Nautical rope for wrapping
Adhesive like E6000
Drawer pulls for replacement
Optional: rope knot embellishments
Budget Tip: Replace standard drawer pulls with nautical rope handles. You can find pre-made rope drawer pulls online, or create your own using thick rope and metal fasteners. This small change can dramatically alter the look of your cabinetry without the cost of a full replacement.
DIY Project: Wrap a plain mirror frame with thick rope for a coastal touch.
Start with an inexpensive plain wooden mirror.
Apply a strong adhesive like E6000 along the frame, then carefully wrap rope around it, keeping each coil tight against the last.
For added detail, create a rope knot embellishment for the corners.
Finish with a clear sealant to protect the rope from moisture.
Tips for Beginners:
Start small with drawer pulls as an introduction to working with rope.
Ensure you have a strong adhesive like E6000 to prevent slippage.
Practice rope wrapping on a smaller object before applying to larger pieces.
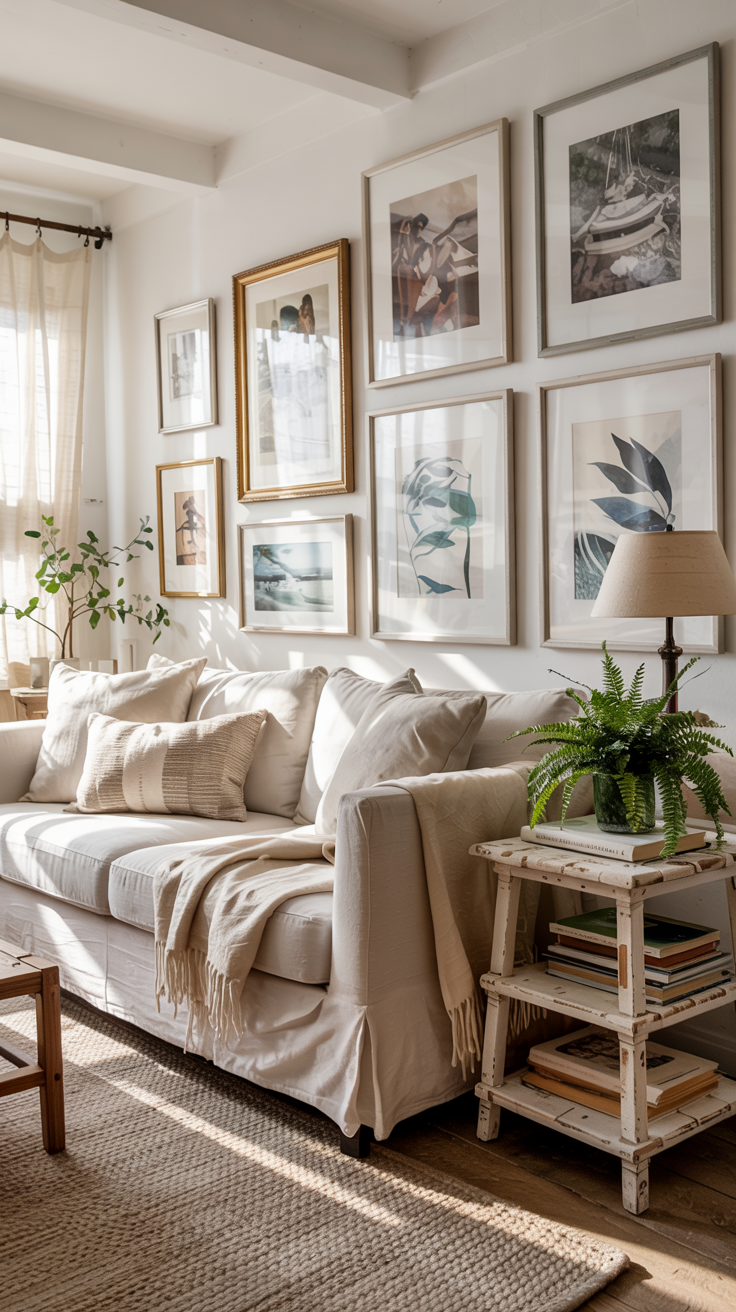
5. Beachy Wall Art
Frame vacation photos or print free coastal art to bring the beach indoors. Make your own shadowbox with seashells and sand for a personal touch.
Picture This: Imagine your walls adorned with a collection of beach memories. Framed photos of your favorite seaside vacations and custom shadowboxes filled with shells and sand turn your laundry room into a personal gallery that celebrates the ocean's beauty.

How to Recreate It:
Materials Needed:
Frames for art/photos
Vacation photos or free prints
Deep picture frames/shadow boxes
Sand and seashells for shadowbox
Budget Tip: Frame beach photos or free printable coastal art. Look online for free printable beach-themed art, or use your own vacation photos. Dollar stores often have simple frames that you can easily paint in coastal colors. Group several small pieces together for a gallery wall effect.
DIY Project: Create a shadowbox with collected seashells and sand.
Find a deep picture frame or shadow box at a craft store.
Paint it a coastal color if desired.
Fill the bottom with a layer of sand from your favorite beach (or craft sand if you don't have access to a beach).
Arrange seashells, sea glass, and other beach findings in an attractive display.
You can even add a small driftwood or rope accent for extra coastal flair.
Tips for Beginners:
Begin with printable art before creating custom shadowboxes.
Lay out shells and sand on a tray to experiment with arrangements before gluing.
Use a hot glue gun for a more secure hold on frames and shells.
6. Woven Baskets
Natural woven baskets add texture and are perfect for storage. Consider painting stripes for additional coastal flair.
Picture This: Envision a collection of natural woven baskets that add both texture and storage. Painted stripes or left in their original hue, these baskets provide a touch of rustic elegance, perfectly fitting the coastal theme.

How to Recreate It:
Materials Needed:
Natural or painted baskets
Painter’s tape for stripes
Spray paint for even coats
Mix of basket sizes/weaves
Budget Tip: Check thrift stores, yard sales, and discount home goods stores for affordable baskets to use as storage. Look for a variety of sizes and weaves to add visual interest. Natural colored baskets work well in a coastal theme, but don't be afraid to mix in some painted ones in sea-inspired hues.
DIY Project: Paint plain baskets with white or blue stripes for a coastal look.
Choose baskets with a tight weave for easier painting.
Use painter's tape to create clean stripe patterns.
Spray paint works well for an even coat, but brush-on paint can also be effective.
Consider leaving some of the natural basket color showing through for a more rustic effect.
Tips for Beginners:
Begin with unpainted baskets to focus on arranging them for impact first.
Use spray paint outdoors or in a well-ventilated area for safety.
Apply a protective spray to help the paint adhere better to woven materials.
7. Shiplap Accent Wall
Peel-and-stick shiplap wallpaper instantly adds that beachy feel. For a weekend project, install real shiplap for a more permanent transformation.
Picture This: Your laundry room transforms with a stunning shiplap accent wall. Whether it's real wood or peel-and-stick wallpaper, this element instantly invokes the breezy feel of a charming beachfront cottage.

How to Recreate It:
Materials Needed:
Peel-and-stick shiplap wallpaper
Inexpensive pine boards for real shiplap
Paint for boards and touch-ups
Nickel spacers for installation
Budget Tip: Use peel-and-stick shiplap wallpaper for an easy installation. This option gives you the look of real shiplap without the cost or commitment of permanent installation. It's also a great choice for renters who can't make major changes to their space.
DIY Project: Install a real shiplap wall using inexpensive pine boards.
Purchase thin pine boards (1x6 or 1x8) from your local hardware store.
Paint them white before installation for easier coverage.
Starting at the bottom of your wall, nail each board in place, using nickels as spacers between boards to create that characteristic shiplap gap.
Use a level to ensure straight lines.
Paint over nail holes and touch up as needed for a polished look.
Tips for Beginners:
Peel-and-stick shiplap is ideal for those new to DIY, eliminating the need for nails or saws.
Start with a smaller wall to hone your installation technique.
Label boards before painting to ensure easy assembly and installation.
8. Coastal-Inspired Tile
Use peel-and-stick tiles for a quick floor update, or stencil a wave pattern on existing tiles for a fresh coastal look.
Picture This: Step onto a floor reminiscent of sun-bleached beach tiles. Whether through peel-and-stick options or a painted stencil design, each tile whispers tales of ocean waves and sandy toes, warming the room with coastal allure.

How to Recreate It:
Materials Needed:
Peel-and-stick tiles or stencils
Bonding primer for existing tiles
Paint and stencil for designs
Clear sealant for protection
Budget Tip: Use peel-and-stick floor tiles in a coastal pattern for a temporary update. Look for designs featuring ocean-inspired colors or patterns like waves, fish scales, or geometric shapes reminiscent of beach umbrellas. These are easy to install and remove, making them perfect for renters or those wanting to test out a look before committing.
DIY Project: Paint existing floor tiles with a stencil in a wave or fish scale pattern.
Clean your tiles thoroughly and apply a bonding primer.
Choose a stencil with a coastal-inspired pattern and use it to apply paint in your chosen colors.
Finish with several coats of clear sealant to protect your design from wear and tear.
This project can dramatically change the look of your laundry room floor without the cost and hassle of tile replacement.
Tips for Beginners:
Choose peel-and-stick tiles for a no-commitment option that can be easily changed.
Use stencils on a piece of cardboard first to practice your painting technique.
Apply a sealant evenly to protect the design from traffic and wear.
9. Driftwood Laundry Signs
Craft fun signs with driftwood or repurpose old wood with chalk paint for a weathered effect. They add a playful touch to any space.
Picture This: Let your walls speak the language of the sea with driftwood signs. Charming messages like "Wash," "Dry," and cheeky phrases bring a whimsical touch, making the space both functional and fun.

How to Recreate It:
Materials Needed:
Driftwood or old wood
Chalk paint in coastal colors
Stencils or freehand lettering
Sandpaper for distressing
Budget Tip: Use chalk paint on old wood for a weathered look. If you don't have access to real driftwood, you can create a similar effect with any piece of wood. Sand it lightly, then apply chalk paint in a grayish or whitewashed tone. Distress the edges slightly with sandpaper for an authentic weathered appearance.
DIY Project: Create custom laundry signs using driftwood or distressed wood.
Once you've prepared your wood, use stencils or freehand lettering to add laundry-related words or phrases like "Wash", "Dry", "Fold", or fun sayings like "Loads of Fun" or "Sorting Out Life One Load at a Time".
Use paint colors that complement your coastal theme, such as navy blue or sea glass green.
Tips for Beginners:
If using found wood, ensure it’s clean and dry before applying paint.
Try various fonts on scrap paper before committing to a final design.
Lean into imperfect finishes for a rustic, authentic look.
10. Beach-Themed Cabinet Makeover
Refresh cabinets with a coat of coastal paint or add beadboard paneling for texture. It’s an affordable way to make a big impact.
Picture This: Your cabinets gleam with a fresh coat of coastal paint, or perhaps they're newly textured with beadboard paneling. This makeover breathes new life into old fixtures, aligning them with your coastal vision.

How to Recreate It:
Materials Needed:
Coastal paint for cabinets
Beadboard for texture
Wood glue and nails for beadboard
Paint for complete coverage
Budget Tip: Paint existing cabinets in a fresh, coastal color. Soft blues, greens, or crisp whites work well. Be sure to properly clean and prime your cabinets before painting for the best results. This can give your laundry room an entirely new look without the cost of cabinet replacement.
DIY Project: Add beadboard paneling to cabinet doors for texture.
Remove your cabinet doors and measure carefully.
Cut beadboard panels to fit within the existing door frame.
Attach the beadboard using wood glue and small nails or a nail gun.
Paint the entire door in your chosen coastal color.
This adds wonderful texture and coastal charm to plain cabinet doors.
Tips for Beginners:
Remove cabinet doors for easier painting.
Lightly sand surfaces before painting to help the color adhere.
Practice installing beadboard on a small project before tackling cabinets.
11. Seashell Accents
Decorate with seashells collected from beach trips. Create a seashell-encrusted frame or mirror for a custom piece.
Picture This: A touch of elegance weaves through your laundry room with seashell-encrusted accessories. These intricate accents, handcrafted from treasured beach finds, whisper of ocean breezes and sunny shores.

How to Recreate It:
Materials Needed:
Cleaned seashells
Plain mirror or frame
Craft glue or tile adhesive
Clear sealant for finishing
Budget Tip: Collect seashells during beach trips for free decor. Clean them thoroughly and use them in various ways around your laundry room. Fill a clear glass vase or jar with shells for a simple decorative touch. Or, hot glue shells around the edge of a plain mirror or picture frame for a custom look.
DIY Project: Create a seashell-encrusted picture frame or mirror.
Start with a plain wooden frame.
Apply a thick layer of craft glue or tile adhesive to the frame.
Carefully place your chosen shells onto the adhesive, arranging them in an attractive pattern.
Fill in gaps with smaller shells or pieces.
Once dry, apply a clear sealant to protect your creation and give it a polished look.
Tips for Beginners:
Start with a small frame or mirror to gain confidence.
Arrange shells first, then glue them into place.
Use a clear sealant spray to protect the shells and frame.
12. Coastal Pattern Curtains
Sew curtains from coastal fabrics or stencil a curtain with nautical motifs. It’s a simple way to bring in pattern and color.
Picture This: Curtains billow gently in the breeze, adorned with playful coastal patterns. Whether sewn from special fabric or stenciled with love, they add color and movement, completing the ocean-inspired tableau.

How to Recreate It:
Materials Needed:
Coastal-print fabric or plain curtains
Sewing supplies if creating from scratch
Stencils for custom designs
Fabric paint for stenciling
Budget Tip: Sew simple curtains using affordable coastal-print fabric. Look for fabrics featuring seashells, starfish, coral patterns, or nautical stripes. Even if you're a beginner sewer, straight curtain panels are an easy project. If sewing isn't your thing, many stores offer budget-friendly, ready-made curtains in coastal patterns.
DIY Project: Stencil a plain shower curtain with nautical or beach motifs.
Buy a plain white or light-colored shower curtain (or use an existing one).
Choose stencils with coastal designs like anchors, seahorses, or waves.
Use fabric paint to apply your chosen design.
This allows you to create a custom look that perfectly matches your laundry room's color scheme.
Tips for Beginners:
Choose a simple pattern to stencil or a straightforward coastal print.
Practice sewing straight lines on scrap fabric if making curtains from scratch.
Consider curtain clips for easy hanging if sewing skills are minimal.
13. Glass Bottle Decor
Reused glass bottles make great vases. Fill them with sand and shells for charming, personalized decor.
Picture This: Bask in the beauty of sunlit glass bottles, filled with layers of sand and tiny shells. Each bottle is a snapshot of the sea, capturing the essence of a beach day in every glimmering layer.

How to Recreate It:
Materials Needed:
Clean used glass bottles
Sand and shells for filling
Colored sand for layering
Corks for sealing bottles
Budget Tip: Collect and clean used glass bottles for free vases. Look for bottles in various shades of blue and green to echo sea glass colors. Remove labels and thoroughly clean the bottles. Group them together on a shelf or windowsill for a striking display.
DIY Project: Fill clear bottles with layers of sand and small shells for display.
Collect different colors of sand (or use colored craft sand) and layer them in clear bottles for a beach-in-a-bottle effect.
Add small shells, pieces of sea glass, or even miniature starfish between the layers.
Seal the bottles with corks for a finished look.
These make beautiful, personalized decor items that remind you of beach vacations.
Tips for Beginners:
Use clean bottles with labels removed to start with a blank canvas.
Experiment with different sand colors outside the bottle first to find the most pleasing arrangement.
Practice layering on a flat surface before filling the bottle.
14. Beachy Pendant Light
Update a light fixture by wrapping it in rope or create a DIY pendant light with a jar and rope for unique elegance.
Picture This: Look up to find a unique pendant light swathed in rope or fashioned from a jar. This focal piece casts a gentle glow, echoing the soft light of a late afternoon on the shore.

How to Recreate It:
Materials Needed:
Large glass jar (e.g., pickle jar)
Rope for embellishment
Pendant light kit (available at hardware stores)
Paint for lid (optional)
Budget Tip: Update an existing light fixture with rope wrapping. Carefully wrap thick rope around the cord or chain of your current pendant light, securing it with hot glue at intervals. This simple update adds instant coastal texture to your lighting.
DIY Project: Create a DIY pendant light using a large glass jar and rope.
Clean and dry a large glass jar (like a pickle jar).
Drill a hole in the lid for the light cord to pass through. Paint the lid to match your decor if desired.
Thread the cord of a pendant light kit (available at hardware stores) through the hole.
Secure the jar to the lid.
Wrap rope around the jar in a pattern you like, securing with hot glue.
This creates a unique, coastal-inspired light fixture at a fraction of the cost of store-bought versions.
Tips for Beginners:
Work with rope and glue on small projects to build confidence.
Use battery-powered LED lights in jars as an introduction before working with electricity.
Follow all safety instructions on pendant light kits closely.
15. Surfboard-Inspired Ironing Board Cover
Cover your ironing board with coastal fabric for a fun twist. Paint the stand to resemble a surfboard for a touch of whimsy.
Picture This: Transform your ironing board into a whimsical surfboard. The playful design brightens a mundane task, adding joy to your coastal-themed laundry oasis.

How to Recreate It:
Materials Needed:
Coastal-print fabric for the cover
Paint for the stand
Painter’s tape for patterns
Budget Tip: Use coastal-print fabric to recover an existing ironing board. Choose a fabric with a fun, beachy print like palm trees, waves, or colorful stripes reminiscent of surfboards. Follow the shape of your current ironing board cover to cut out and sew a new one. This is an easy way to inject coastal fun into a mundane item.
DIY Project: Paint your ironing board stand to resemble a surfboard.
Remove the cover and board from the stand.
Sand the stand lightly, then apply a base coat of paint that is typical of surfboards (blue, yellow, or white work well).
Once dry, use painter's tape to create stripes or other classic surfboard designs. Paint these sections in complementary colors.
Finish with a clear sealant for durability.
You'll have a unique, beach-inspired ironing station when you replace the board and new cover.
Tips for Beginners:
Cut fabric a bit larger than needed; it’s easier to trim excess than to fix shortages.
Keep paint patterns simple initially, like stripes or basic shapes.
Always allow paint and adhesive to dry fully before use.
Let’s get started
Remember, these ideas are about personalizing your space and making it uniquely yours.
I’m here to cheer you on to try these easy and affordable projects that will make your laundry room a refreshing coastal haven.
Happy decorating!